Included with Windows 7 is Windows Media Player 12 allowing you to turn your PC into a media server to stream photos, music and movies to other computers and devices on your home network. In today’s tip I will show you, computer repairs fans, how to set up streaming and how to use it.
Enable Streaming
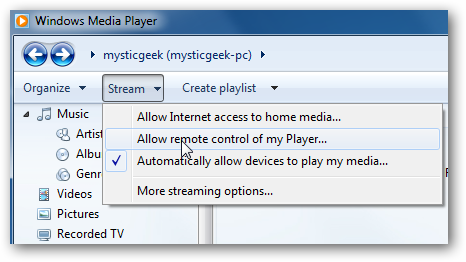
To begin the process of streaming you need to turn Media Player on – open it under the Library section and click on *Stream* and then click *Turn on media sharing*

Next just click the button to turn the media streaming on. If you want you can bypass Windows Media Player and open Control Panel All Control Panel Items Network and Sharing Center Media streaming options then click on the button to turn on media streaming and press OK.
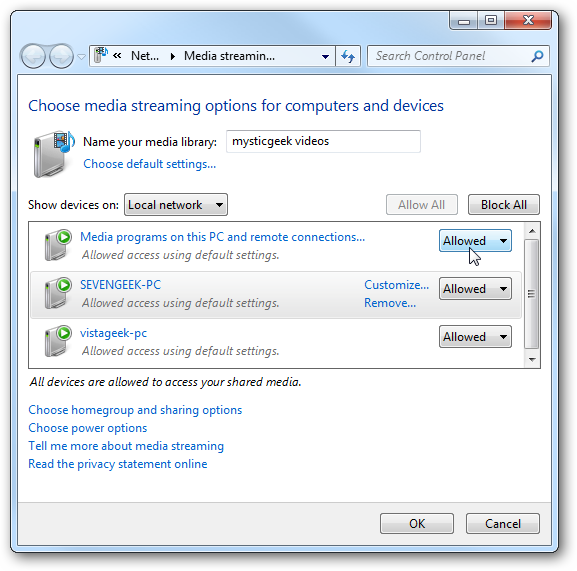
You’ll now be able to see what devices are connected to your network and you can set up which device or computer can have access to the media.
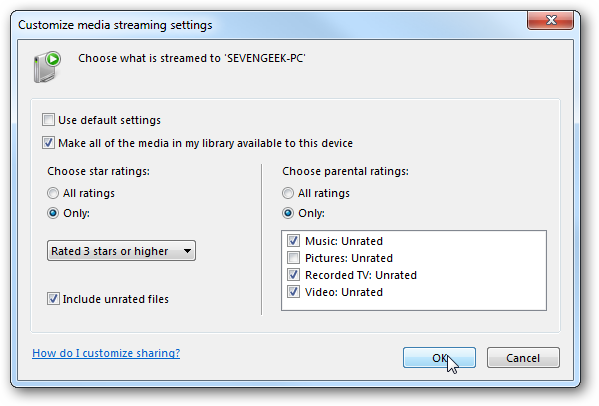
You will also be able to customise the streaming settings by selecting what you want to share and you’ll also see the parental control settings
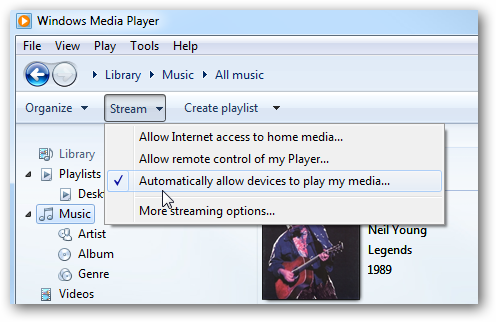
Setup Windows Media Player
Now that your streaming media is set up, we’ll take a look at what to look for with Windows Media Player. Go to your other computer on the network open Windows Media Player and under the *Library* you’ll see *Other Libraries* and the libraries of Video, Pictures and Music that are available for streaming.
This is a handy new feature that can allow you to have one computer with a LOT of disk capacity running just like a media server, freeing up your other computers that have less space and still enjoy all the media they want – it is even suitable for netbooks.
I do hope that this computer repairs how to blog update was of help to you 🙂
Over and out
Mobile Geekette


